Introduction:
This project covered the foundation of flip meshing techniques as well as the volume collision. The reference video is an excellent combination of effects elements since it demonstrated the whole process of merging and the water movement. It also brings the challenge for this project because the fluid simulation interacting with dynamic collision containers is an effect that I have never encountered before, including the Arnold shader tweaks.
Techniques:
- Metaball animation & Flip collision setup
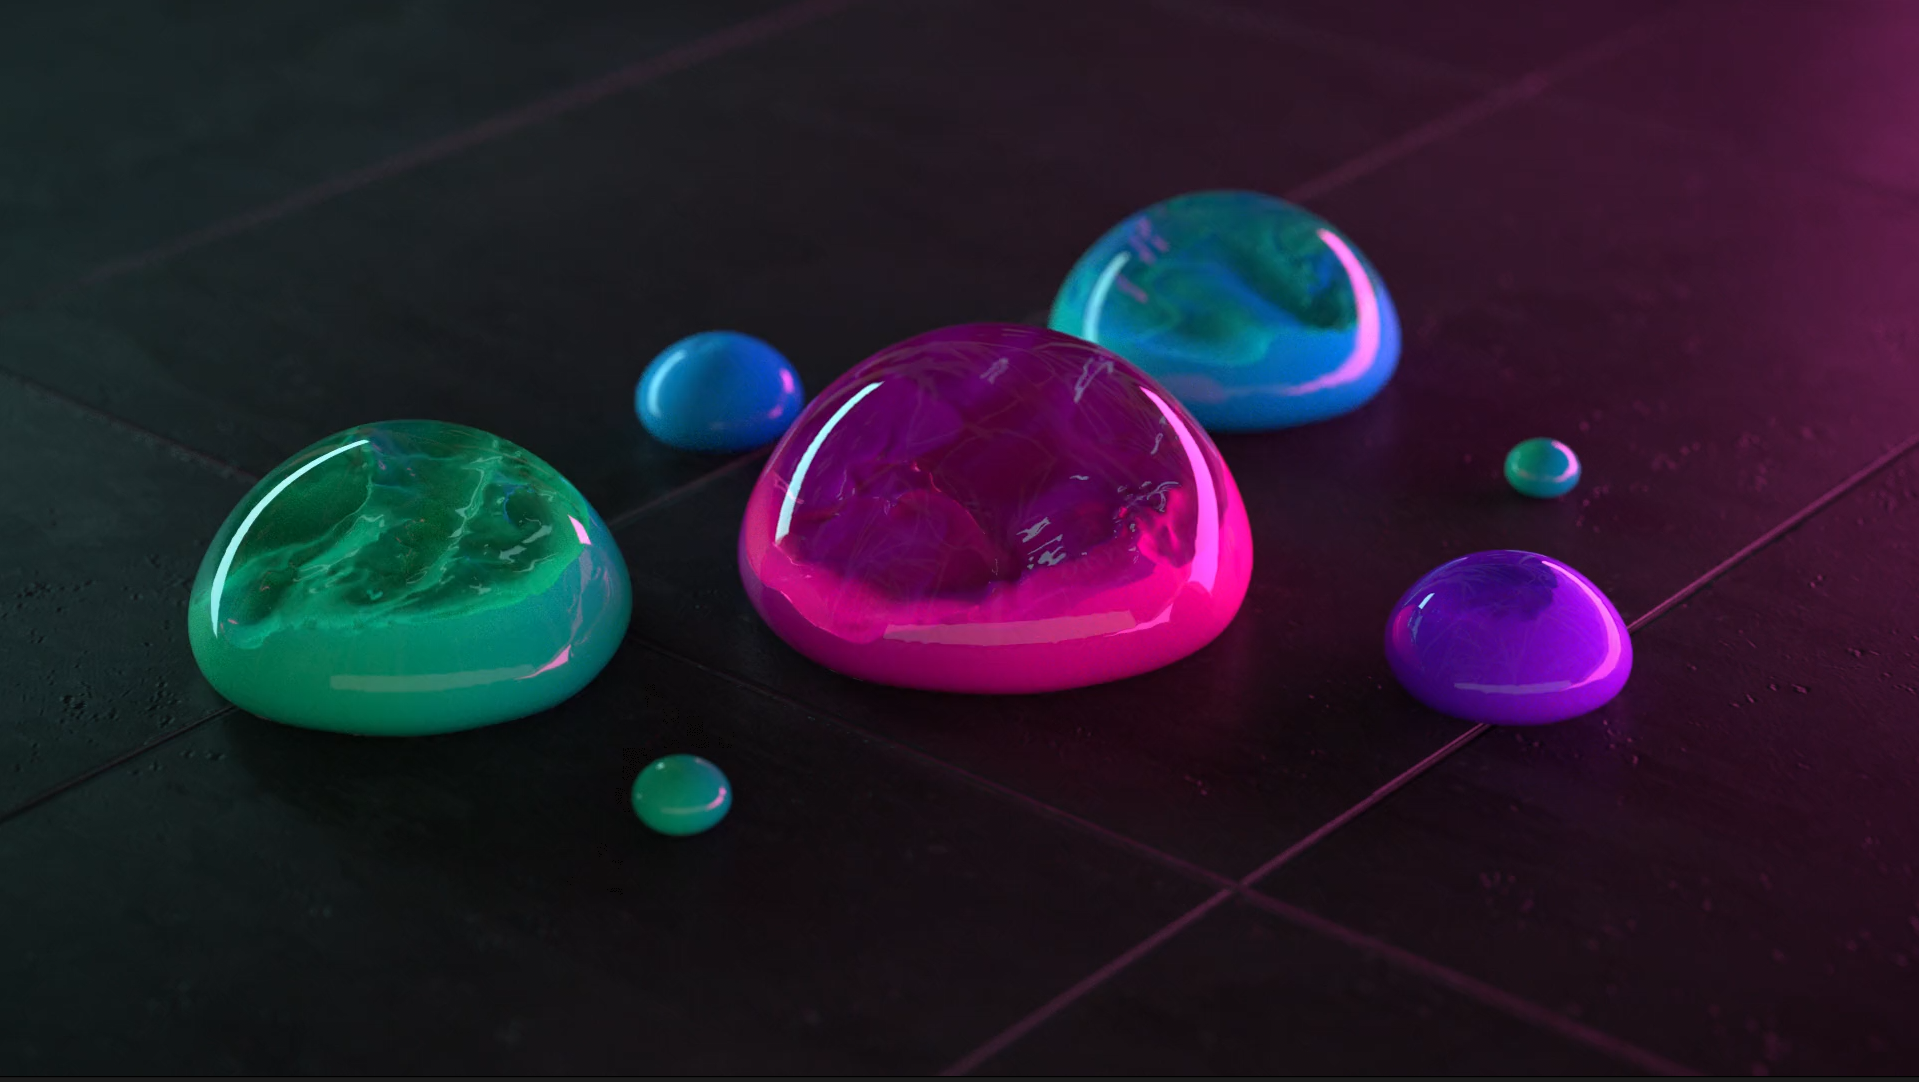
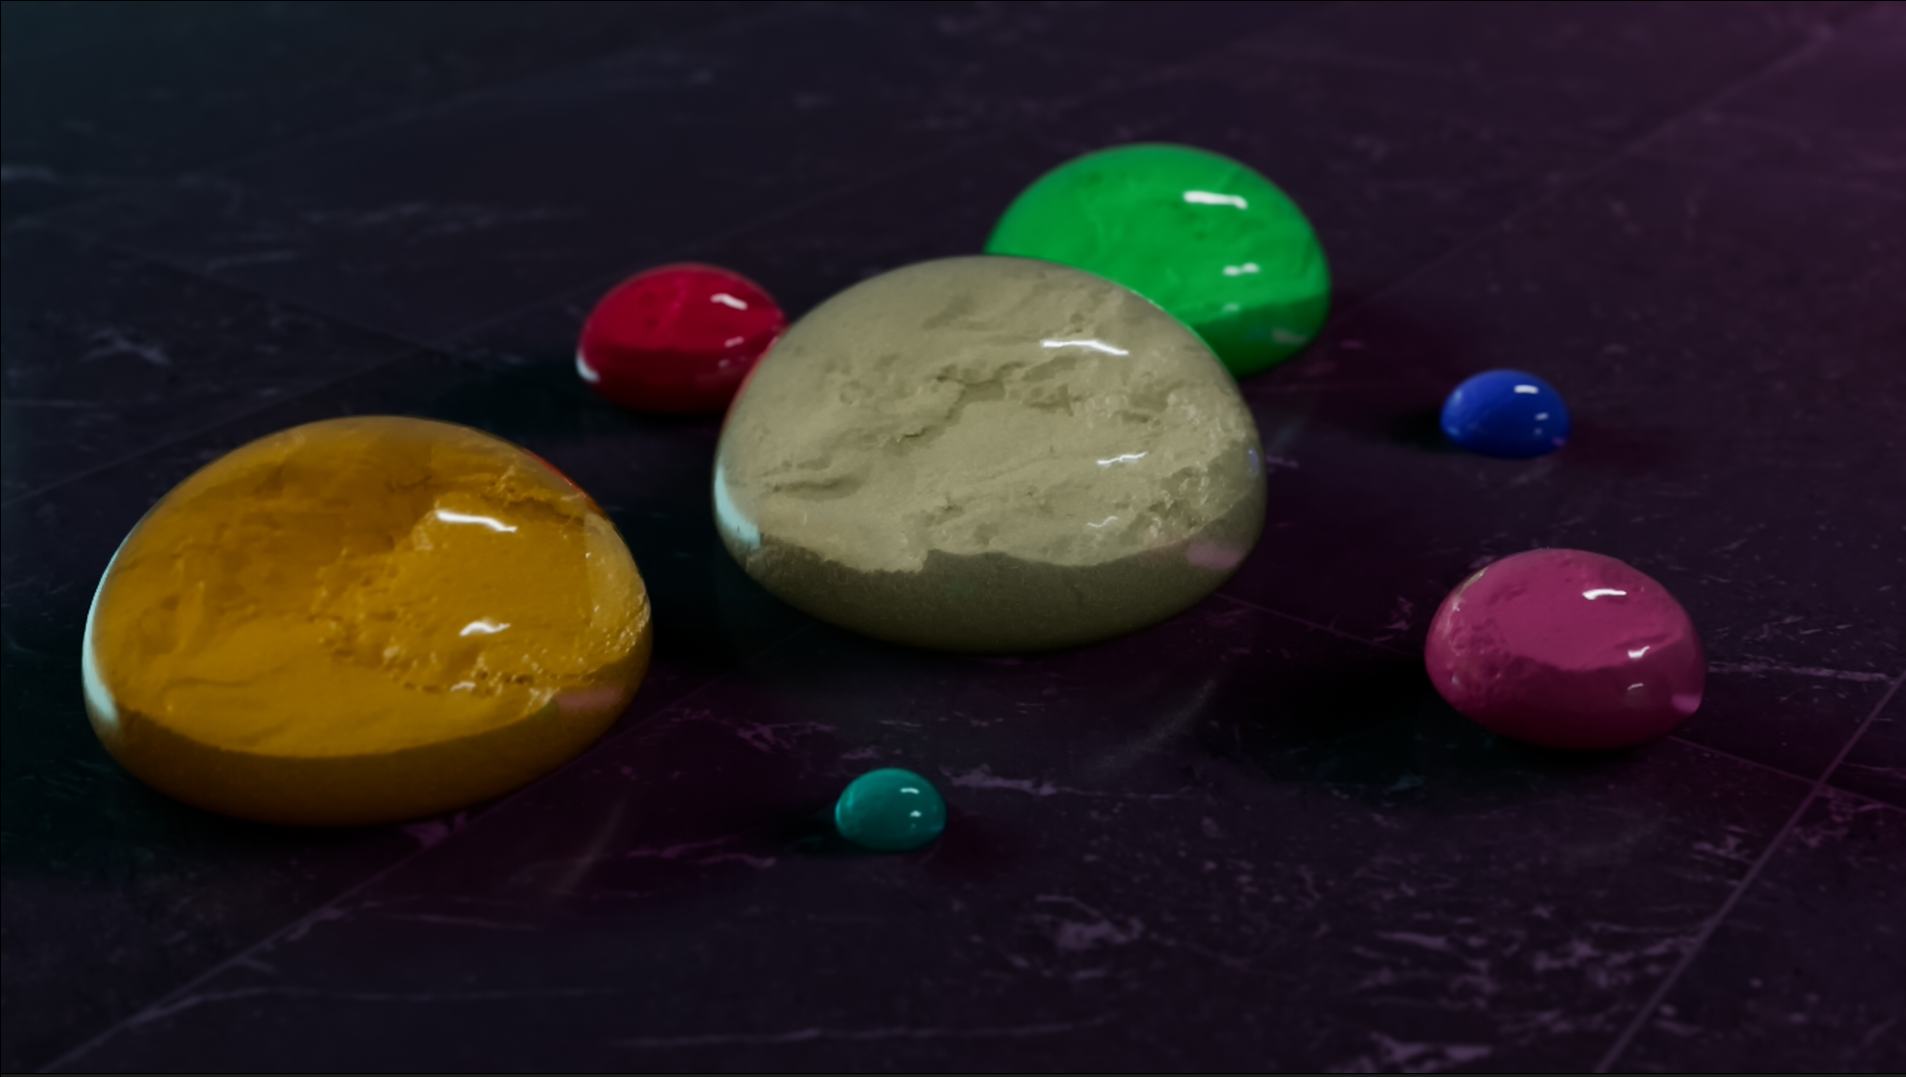
In this project, the main animation is based on the goopy meatball- like shape behavior. This could be done with high surface tension flip simulation; however, it is not suggested to use that method since the sim process could be not efficient in generating a proper collision proxy for the inner sim. After testing several times, I choose the original meatball node at the end and tweak them with keyframes animation to obtain an overall match with the reference video.
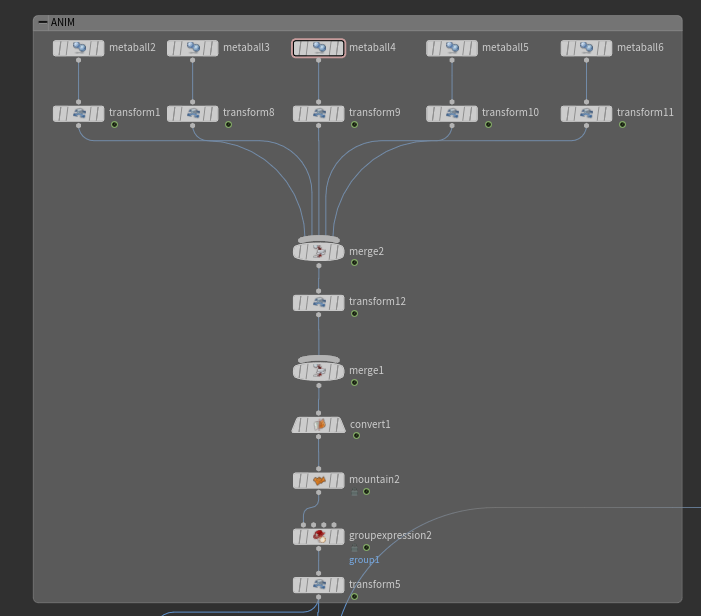
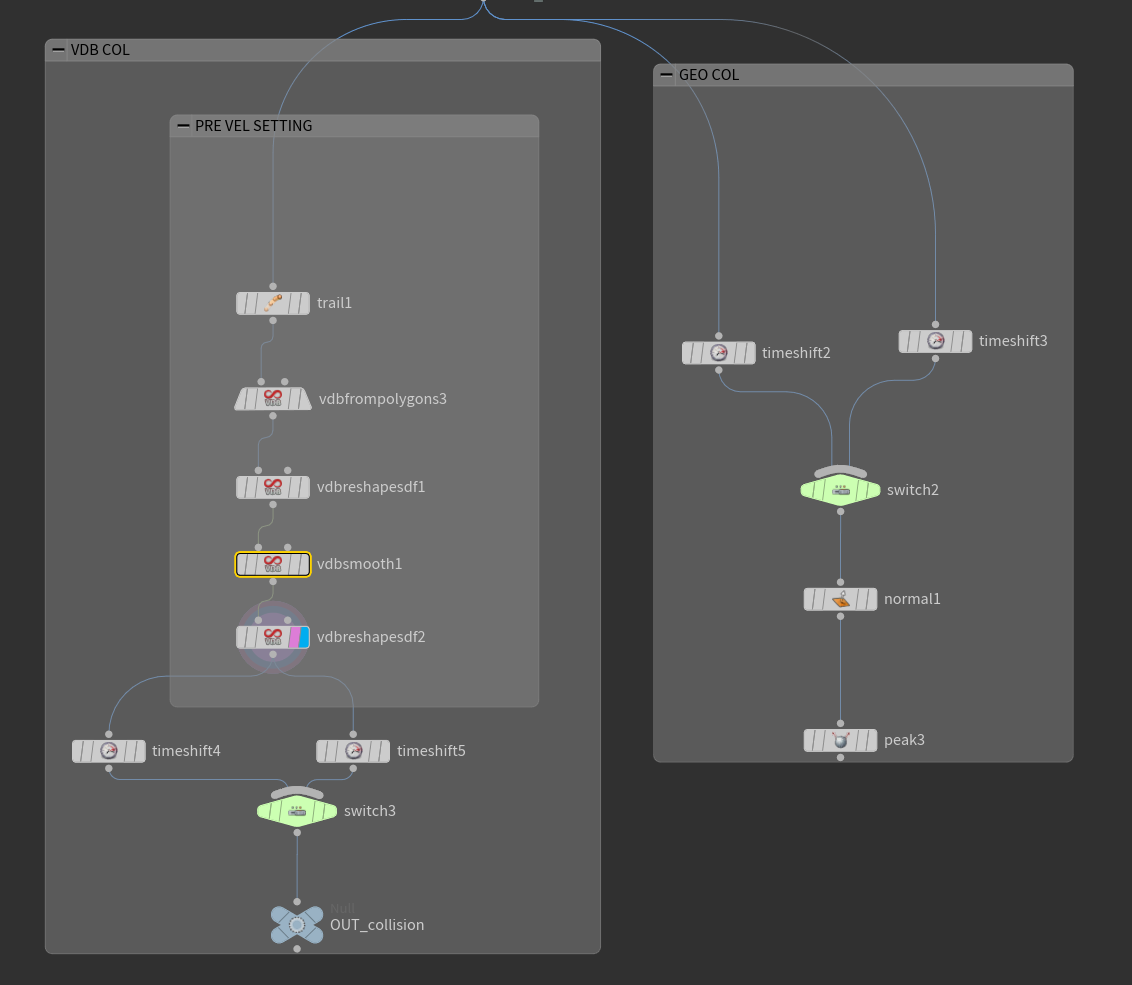
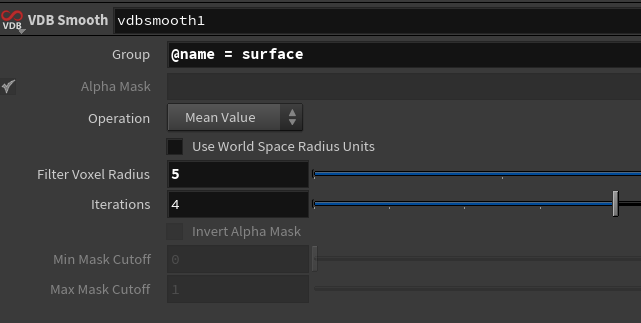
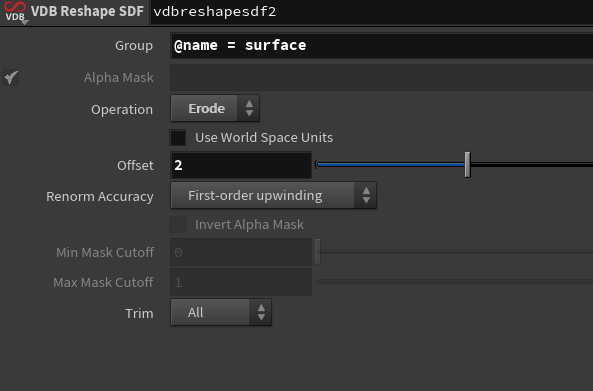
For the flip collision part, the crucial step is to calculate the correct velocity for the collision VDB surface. Since the position for points are moving, as well as the total number of points varies along with time, the trail SOP will not work. To solve this problem, I managed to connect the author of the reference video Mark Fancher, and he presented the solution to this issue. Before transforming all the geometry into VDB proxy, he converted individual meatball to polygon and merged them, so the total point number did not change, and the trail SOP calculated velocity in the right way. Also, in order to maintain the goopy animation, both VDB Reshape SDF nodes, as well as VDB smooth node, were introduced to offer a little filtering and shape adjustment.
- The flip source setup
The particle source is generated from the meatball geometry. Since the drops in the reference video have different colors, so it is necessary to generate the color attribute before importing it into the DOP network. When the primitives are connected, they can have the same ID attribute attached. By promoting this attribute to the point level, it can be transferred to the points and then assigned with random colors based on the IDs.
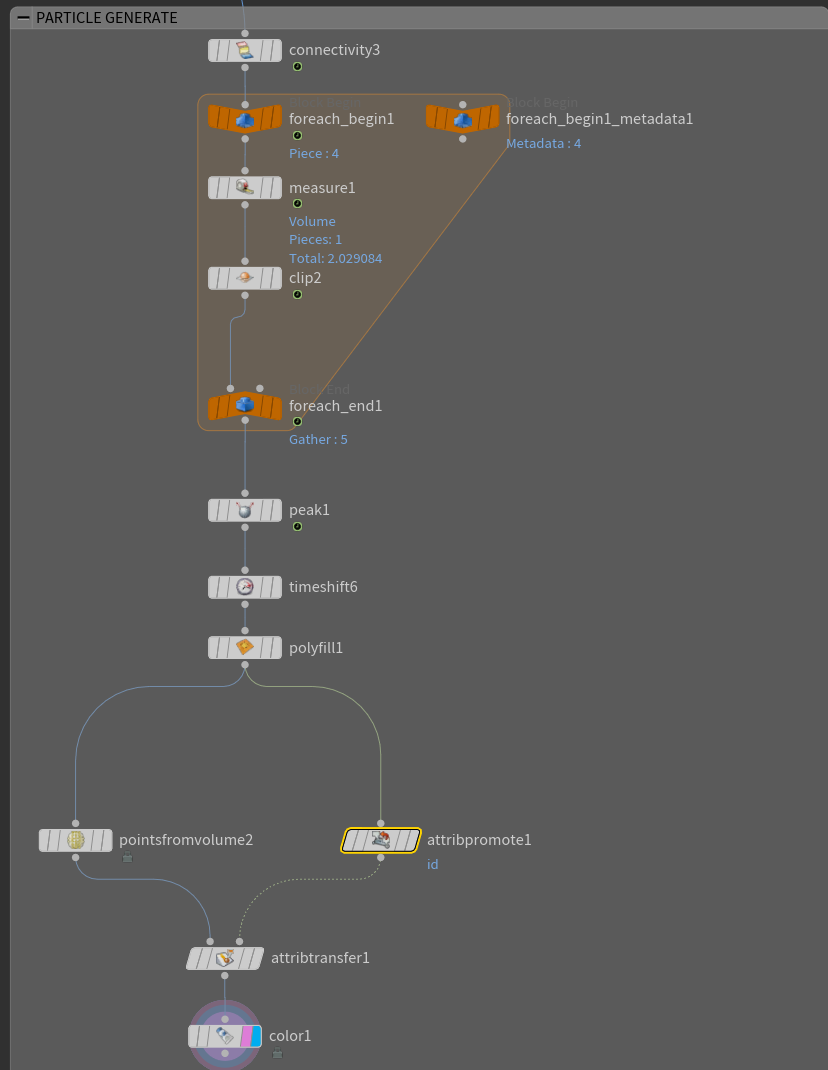
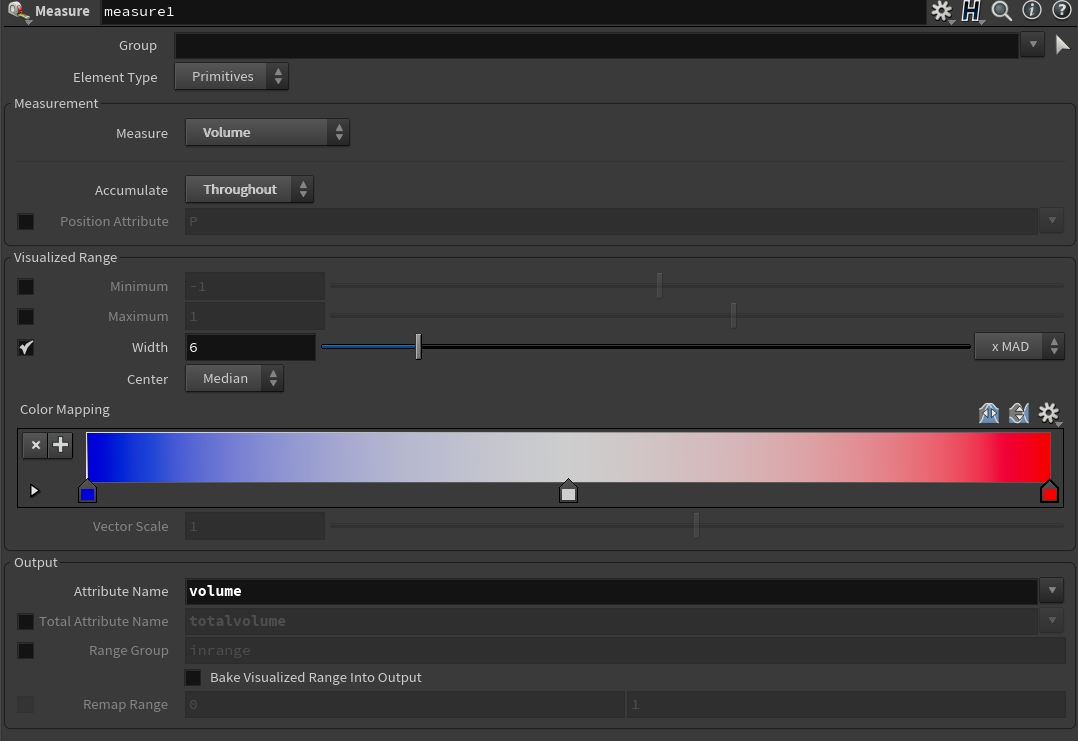
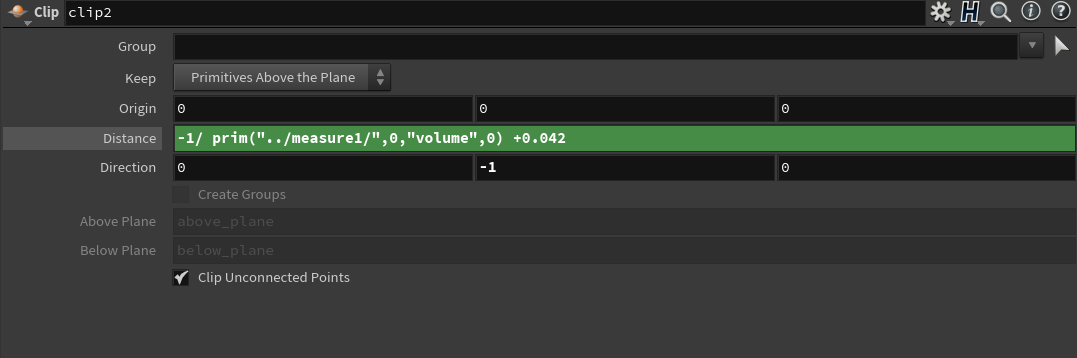
Notice that an for each loop in this setup is added. The reason for this loop is the varying water level by measuring total volumes. The reference video has various water levels since it would present weight differences when merging. In order to achieve this initial status, the “Measure” node can provide essential assist in calculating total volume by the ID numbers. Meanwhile, the clip node can share this data, so the result would be like the more volume inside a single bubble, the less initial flip particles are generated.
- Collison type in the DOP network?
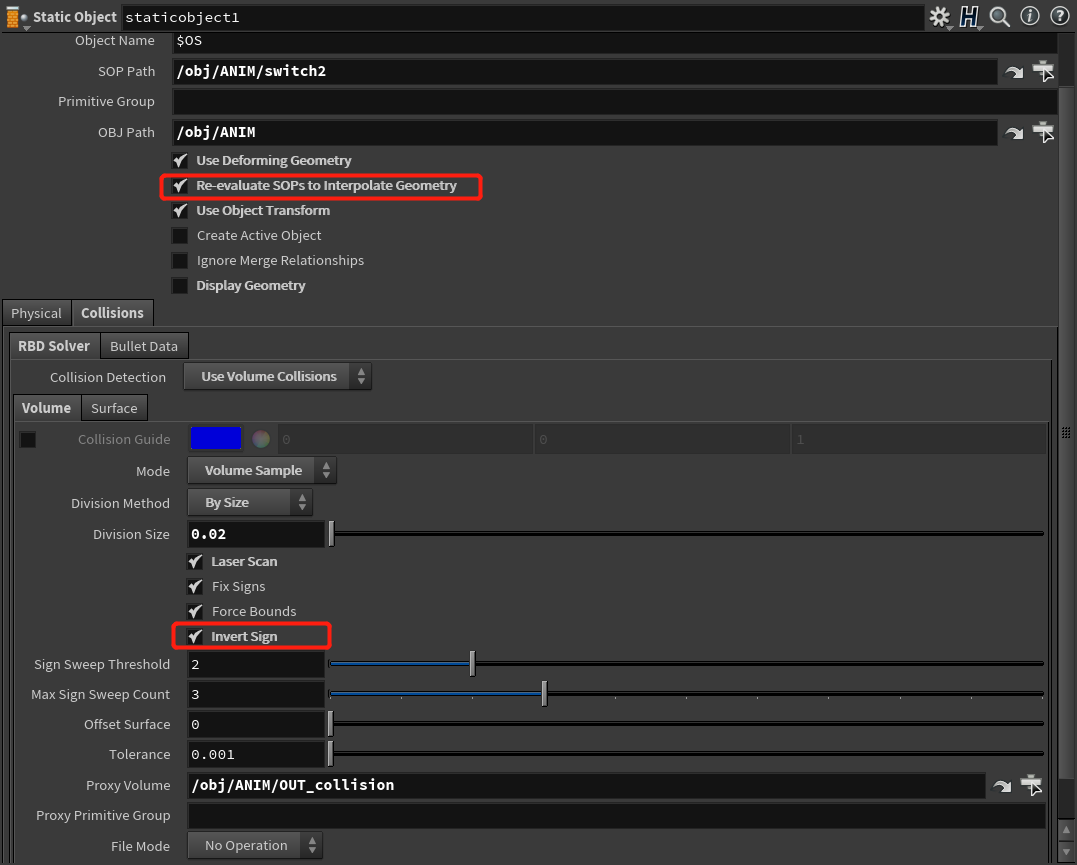
As for the basic flip simulation workflow, the flip solver determines the result for the flip particle movement. However, the collision method also matters. It can be seen in the reference video that there is a significant velocity field introduced when the bubbles are merging. What is essential in achieving this look is that the flip particles should obtain the correct collision velocity during solving progress. Using a volume source node could do the job, but it does not calculate the collision velocity in the SOP level, and it is mostly suitable for collision objects without animation. So, the static object node could be a better choice. Since the original animation can be very fast when interacting with particles, I just let the “Re-evaluate SOP’s to interpolate Geometry” function enabled to avoid substeps issues causing by insufficient SOP interpolation. Remember to enable the “Invert Sign” function to generate the correct collision surface for the flip solver to recognize. The solver uses an adaptive collision detection method, and it is sensitive to collide in the right direction. For the collision type comparison presented here, there is a page also discussed this topic in the SideFX community forum: https://www.sidefx.com/forum/topic/55015/?page=1#post-246766
Under the flip solver tab, I just slightly lower the surface extrapolation to keep the splashes more stable and change the collision velocity type from “point” to “volume” because the collision proxy is VDB surface. I also increase the” Min substeps” to 2 in case of possible fluid leaking issue.
For the initial status of water, it needs some custom force to bring in the disturbance. The force velocity sources from two ocean spectrum with different amplitude and wind scale. Then I use VDB conversion and force the individual axis velocity to be merged in a vector field to be imported as a force driving flip particles.

- Tips for fluid simulation and meshing
For the water simulation part, it is essential to acknowledge the scene scale and the necessity to simulate with real-world size. If the model is tiny, then more particle separation (voxel size) is demanded and will slow the whole process. Also, remember to check the actual collision proxy shape by checking the “Collision” option under the “Visualization” tab. It helps to trace how the collision proxy changes with time, preventing possible flip particle volume loss.
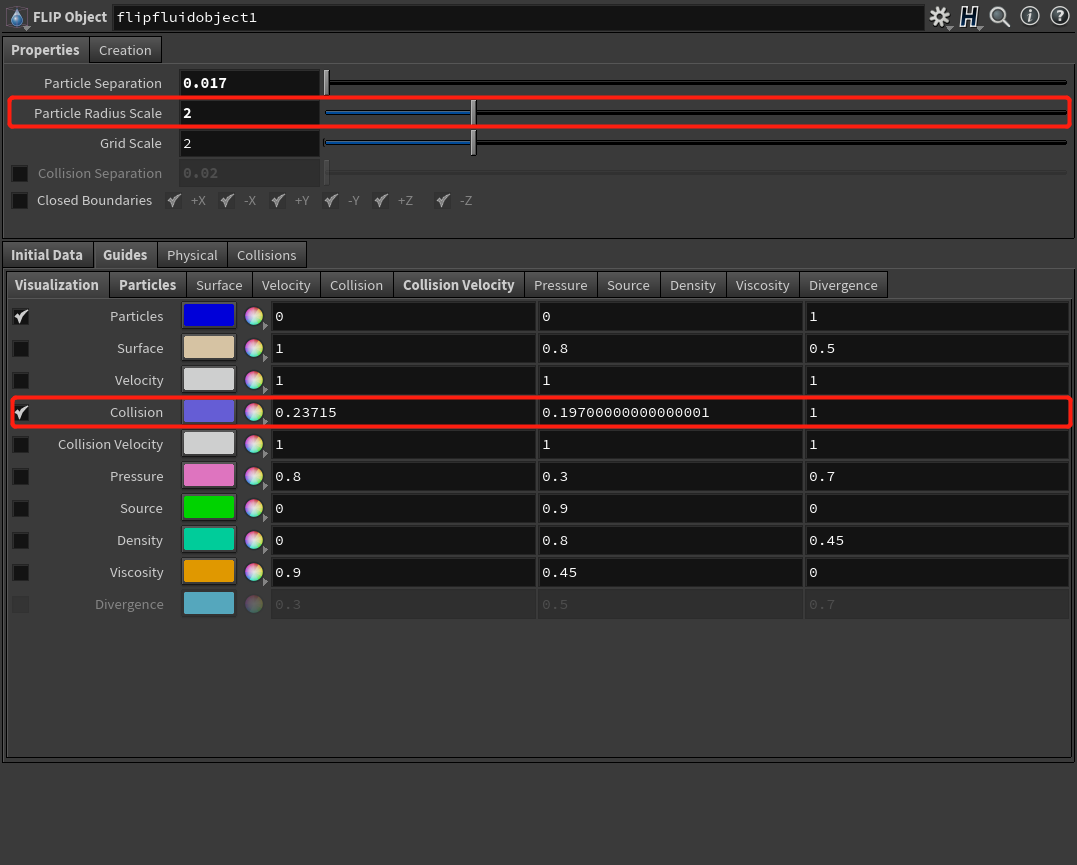
What is the “flip particle volume loss”? One answer is that the water level is gradually becoming lower than the previous status. In this website, the author offers a complete explanation about the solution: http://www.tokeru.com/cgwiki/index.php/title=HoudiniDops#Stopping_volume_loss. However, if the result is still not satisfying, try to increase the Particle Radius Scale a little bit as it controls one single volume representation of a particle. This could help preserve the volume at the cost of losing details of the flip simulation. For most situations, the default value works for mid to large-scale simulations.
At the meshing step, it is suggested to cache the particles without the “Fluid Compress” node since they carry all the attributes you need for the meshing step. The “Fluid Compress” packs all the particles under specific cull bandwidth. It could significantly reduce the size of the caches unless you figure out the right bandwidth value for the simulation; however, it lacks the ability for adjustment as all the particles got zipped.
For the color mix effect, the color attribute can be exported without issues and blurred by using the “Attribute blur” node. Usually, the node finds the borders of different colors and blend them within thresholds. After that, the attribute is transferred into mesh polygon soup.
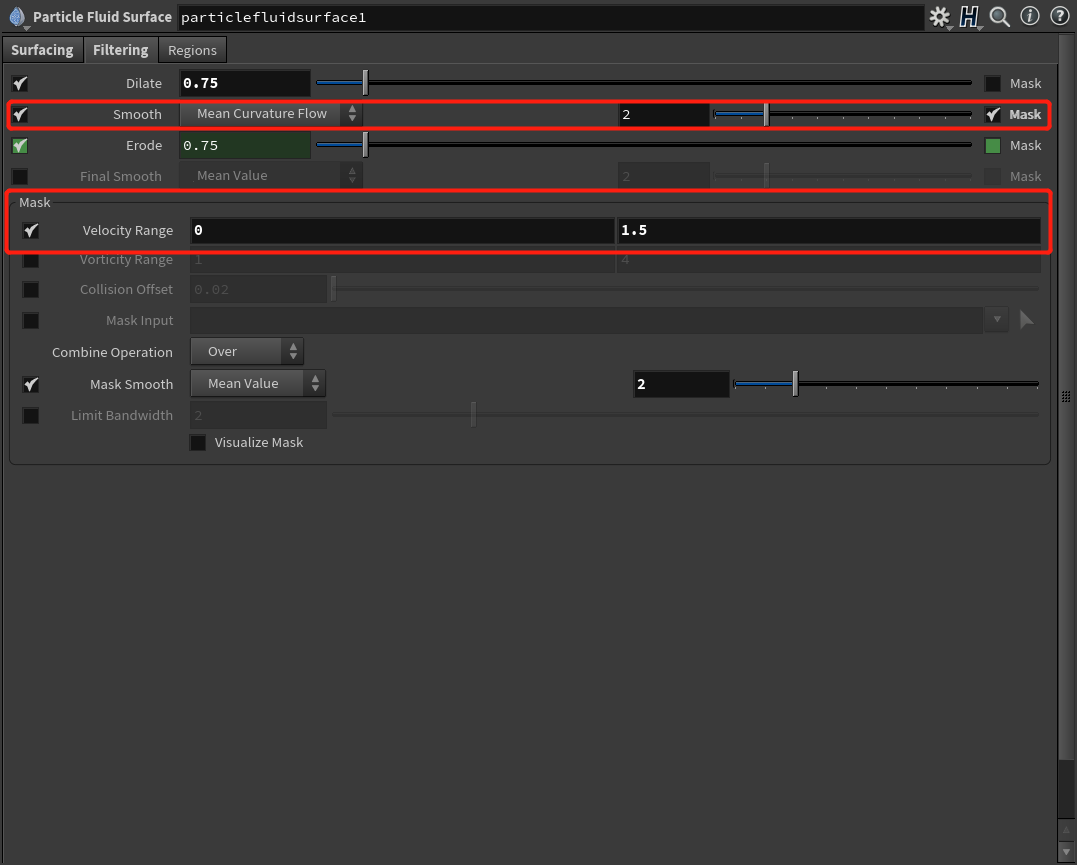
Dilate and erode functions are very useful for smoothing the mesh. In the post-process of the meshing part, these two functions can be driven by velocity or vorticity masks. Also, try to subtract the output VDB with the collision volume using “Collision offset” under the “Regions” tab to avoid mesh surface jittering in some cases.
- Arnold Shader tips
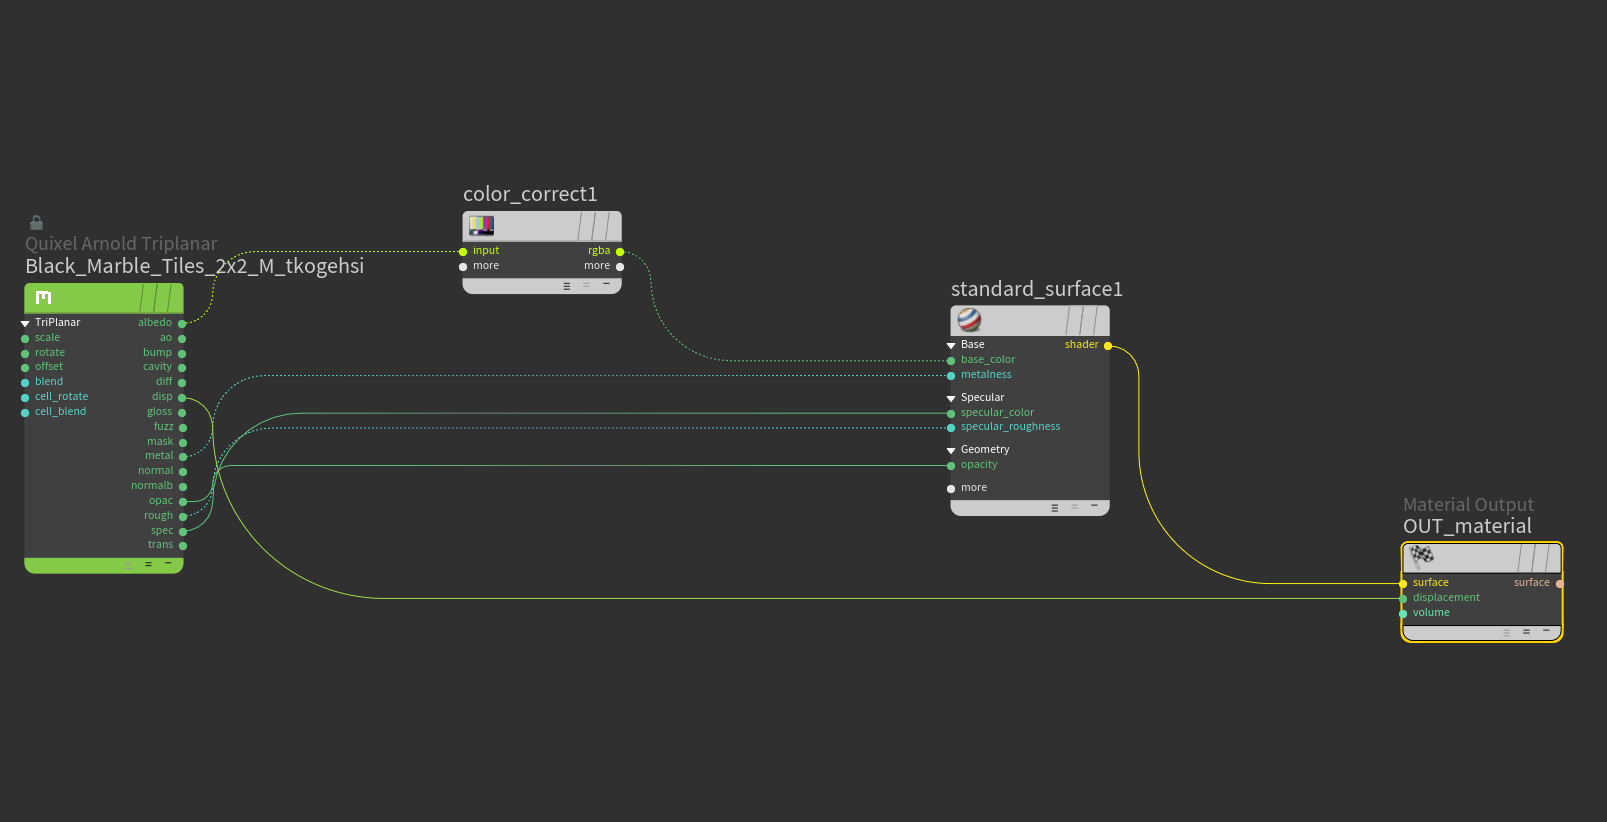
For the bubble shader, it is essential to just keep the surface transparent with a high amount of highlight to display the outer shape of bubbles. As a result, the coat reflection value is set to 1, and the roughness is set to 0.1. For the fluid shader, the color attribute from the water surface is imported to guide the base color for the shader, and I also lower the reflection and bring in some subsurface value to give the fluid some “juicy” look. The floor shader is just a simple tile texture directly imported via Quixel Megascans Link plugin, and it generated Quixel Arnold Triplanar node for customizing texture scales and other color parameters.

- Results and further improvements
The general purpose of this project is to practice small scale flip simulation inside the dynamic collision object. By combining several techniques in dynamic simulation, plenty of elements contained in the reference video is certainly presented successfully. However, there still lots of improvements needed for further revision, such as the highlight on the bubble surface flickers, and the water interior is darker comparing to the reference video. The flickering issue may come from the point number change in the geometry, but I have never tested yet.

